


如何在 QNAP NAS 設定 AWS Greengrass
WriterShelf™ is a unique multiple pen name blogging and forum platform. Protect relationships and your privacy. Take your writing in new directions. ** Join WriterShelf**
WriterShelf™ is an open writing platform. The views, information and opinions in this article are those of the author.
Article info
This article is part of:
Categories:
⟩
⟩
Tags:
Total: 331 words
Like
or Dislike
About the Author
同步刊載於 冒險筆記 https://tttt-note.blogspot.com/
More to explore


本篇教學文章將說明如何在 QNAP NAS 設定 AWS Greengrass。安裝 AWS Greengrass前往 QTS App Center,尋找[AWS Greengrass]並點擊[安裝]。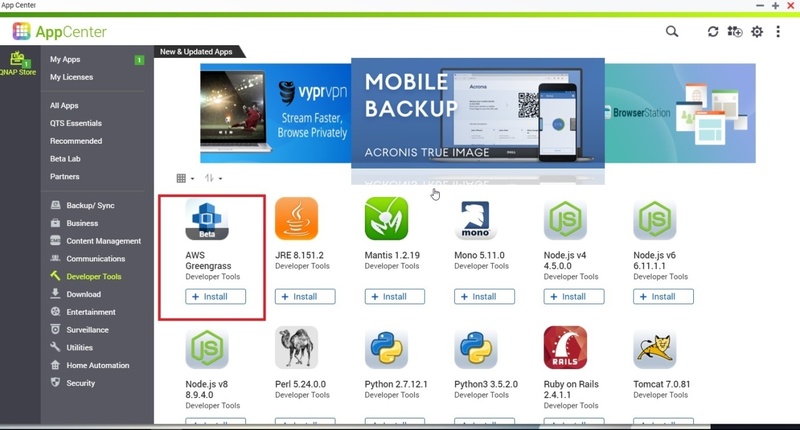 在 AWS IoT 私有雲設定 AWS Greengrass
若要在 AWS IoT 設定 AWS Greengrass,請參見: https://docs.aws.amazon.com/greengrass/latest/developerguide/gg-config.html(*您無須下載「Greengrass Core 軟體」,因為其已隨附在 AWS Greengrass 應用程式中)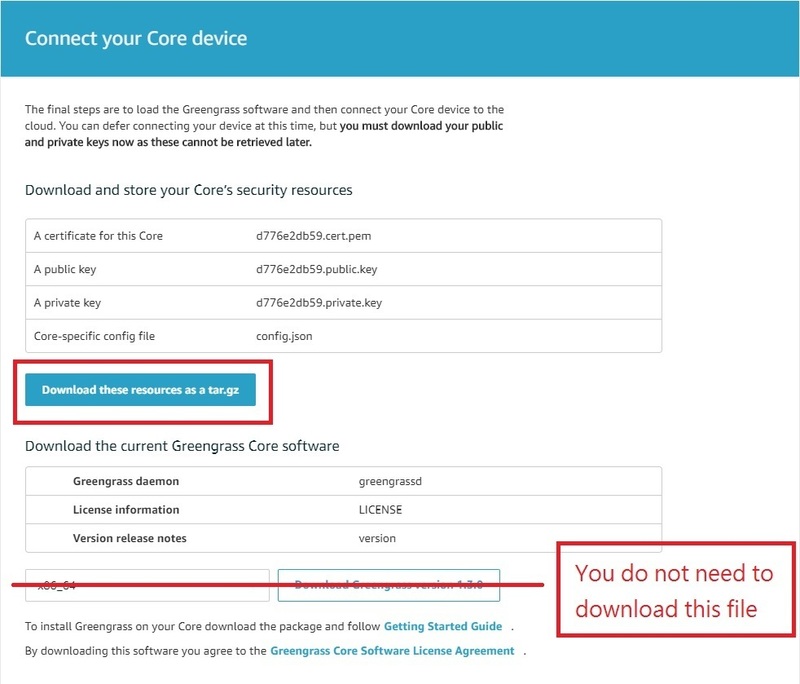
下載 AWS IoT 根 CA 並重新命名為「root.ca.pem」
將 Greengrass Core CA、憑證和金鑰上傳至 AWS Greengrass Core 應用程式
在您的 QNAP NAS 開啟 AWS Greengrass。
在[Greengrass 設定檔]選擇[xxxxxx-setup.tar.gz],然後點擊[上傳]。
在[AWS IoT 根 CA]選擇[root.ca.pem],然後點擊[上傳]。
點擊[開始]。
前往[狀態]。 狀態應顯示[Greengrass 成功啟動]。
測試功能 1. 建立兩個裝置(分別為發佈者與訂閱者)
按照「模組 4: 與 AWS Greengrass 群組中的裝置互動」所列的步驟操作。網址為: https://docs.aws.amazon.com/greengrass/latest/developerguide/module4.html* 如果顯示下列訊息,表示範例程式碼正嘗試連接 Greengrass Core 中所有已設定的 IP 位址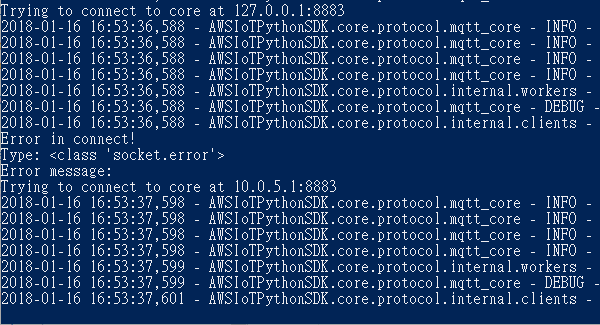 * 如果顯示下列訊息,表示您輸入的指令或憑證可能有誤
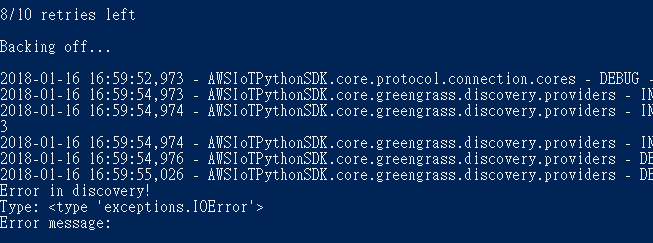
測試功能 2. 在 Greengrass Core 執行 AWS Lambda
按照「模組 3(第 1 部分與第 2 部分):AWS Greengrass 上的 AWS Lambda」所列的步驟操作。網址為:https://docs.aws.amazon.com/greengrass/latest/developerguide/module3-I.htmlhttps://docs.aws.amazon.com/greengrass/latest/developerguide/module3-II.html
若要深入瞭解 AWS Greengrass,請參見以下網頁:https://aws.amazon.com/documentation/greengrass/